> For the complete documentation index, see [llms.txt](https://doc.playturbo.com/llms.txt). Markdown versions of documentation pages are available by appending `.md` to page URLs; this page is available as [Markdown](https://doc.playturbo.com/playable-tools-content-editor/work-creation-create-a-new-project.md).
# Work Creation-Create a New Project
\#Content Editor
There is no particular difference between the way projects are created in "Template Content Creation" and "Blank Canvas".
## 1.Template Content Creation
### STEP1 Choose from a wide selection of templates
* Method 1: You can quickly find suitable templates based on Method, Industry, or Template Type.
* Method 2: You can also enter keywords in the search bar to quickly search for relevant templates.
### STEP2 Select a template
* After selecting a template, the following interface will appear. You can preview the template's effects to see if it meets your expectations. You can also use your phone to scan the QR code for a preview.
* The template will also come with two preset skins, allowing advertisers to create playable ads that align with their product style more efficiently.
### STEP3 Select the creation method
Click on "Content Creation" to confirm the selection of the production method.
### STEP4 Enter the project name
After selecting the production method, enter the project name and click "Confirm" to proceed to the project editing page.
**Please note:** The project name should only contain numbers, letters, underscores, and be within 50 characters.
## 2.Blank Canvas
### STEP1 Create Blank Canvas project
* Enter the playable project page - Content editor area
* Create Project - Blank Canvas
### STEP2 Enter the project name
**Please note:**The project name should only contain numbers, letters, underscores, and be within 50 characters.
### STEP3 Select the adaptation direction
* Supports three types of screen adaptation: **Horizontal & Vertical screen**, **Landscape**, and **Portrait**.
* Once the project is created, the adaptation orientation cannot be modified.
* If you made an incorrect selection initially, it is recommended to duplicate the project and then choose and edit again.
#### **1)** Horizontal & Vertical screen
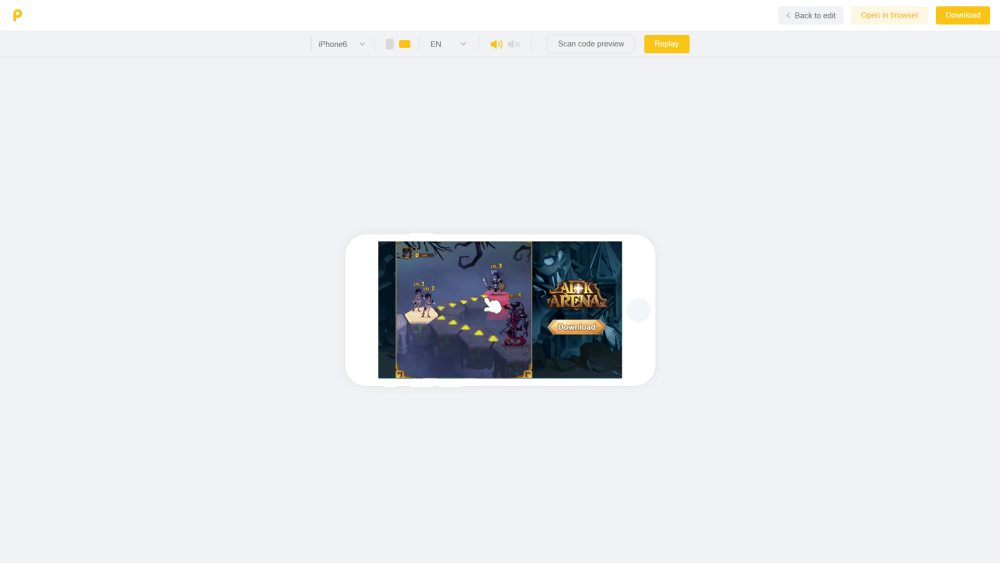
* It is necessary to complete both horizontal and vertical screen scene production in one work.
* During display, the appropriate direction will be automatically selected for the creative according to the current display direction of the app (e.g. when the app is vertically displayed, the vertical screen design of the work will be displayed; when the app is horizontally displayed, the horizontal screen design of the work will be displayed)
* The actual adaptation is as follows:
|  |  |
| ------------------------------------------------------------------------------------------------------------------------------------------------------------------ | ------------------------------------------------------------------------------------------------------------------------------------------------------------------ |
| Vertical screen | Horizontal screen |
#### **2) Portrait**
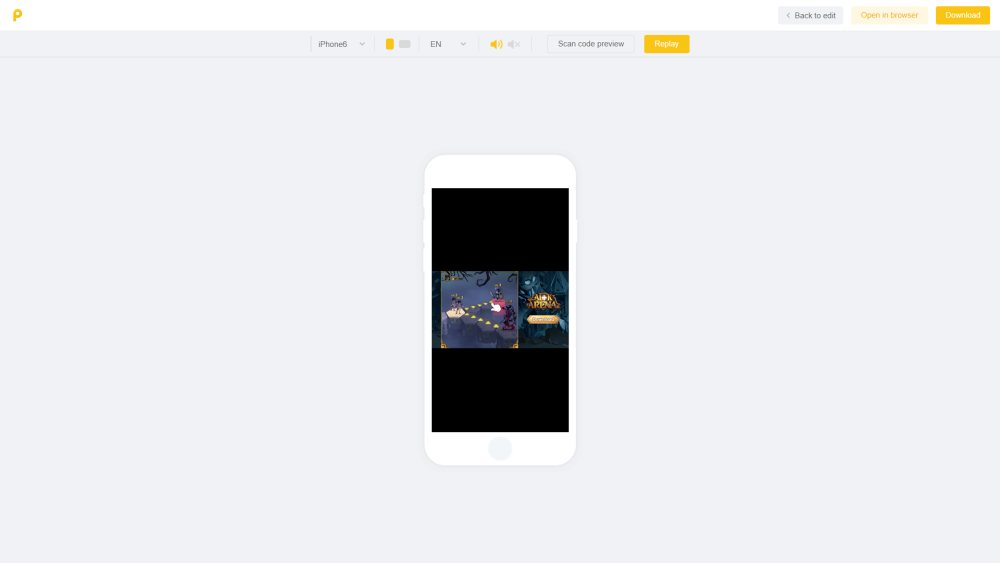
* In one work, only the vertical screen production is needed to be completed.
* When displaying, no matter what the display direction of the current App is, only the vertical screen design is displayed,and the spare area will be filled with black by default.
* The actual adaptation is as follows:
|  |  |
| ------------------------------------------------------------------------------------------------------------------------------------------------------------------ | ------------------------------------------------------------------------------------------------------------------------------------------------------------------ |
|
Vertical screen
(vertical design only)
|
Horizontal screen
(spare areas are filled with black by default)
|
#### **(3) Landscape**
* In one work, only the horizontal scene production is needed to be completed.
* When displaying, no matter what the display direction of the current App is, only the horizontal screen design is displayed,and the spare area will be filled with black by default.
* The actual adaptation is as follows:
Horizontal screen
(horizontal design only)
Vertical screen
(spare areas are filled with black by default)
Once the creation is complete, you can enter the project and start editing 👉 [Content Editor-User Guide](/playable-tools-content-editor/content-editor-user-guide.md)